
Starting vlogging for the first time? Learn the right way to choose a camera, lens, and microphone..
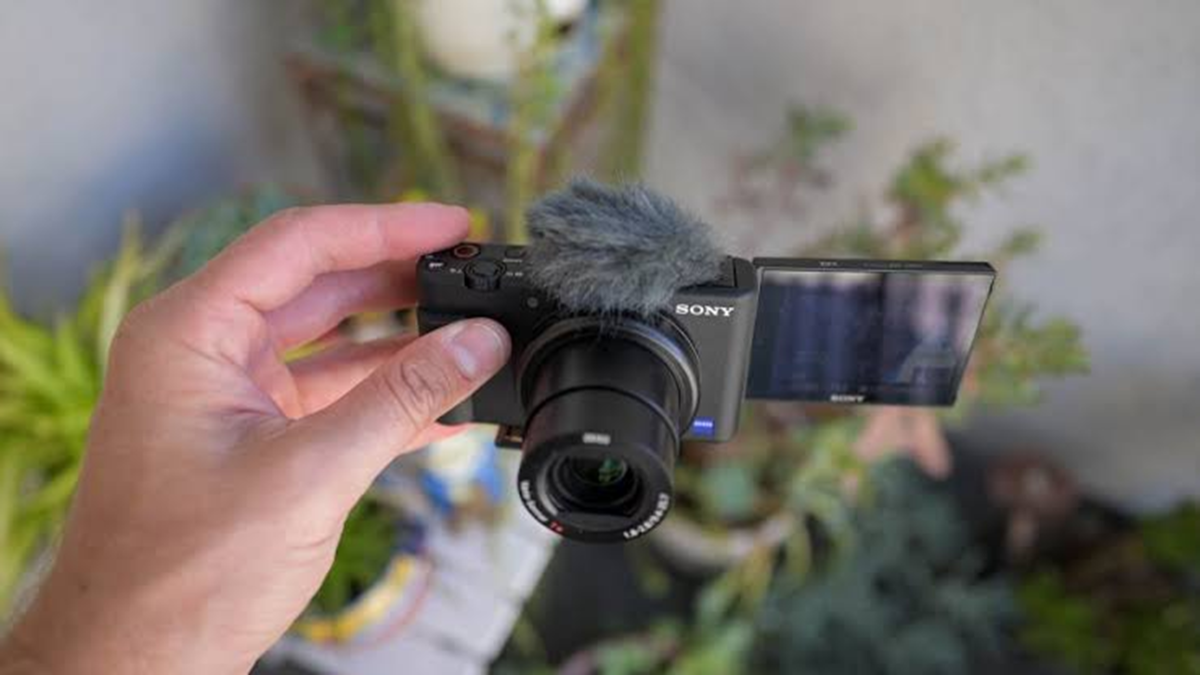
In today’s world, vlogging is no longer just a hobby; it has become a great source of income. Platforms like YouTube, Instagram, and Facebook are filled with popular vlogs covering topics such as travel, lifestyle, food, technology, and daily routines. However, creating high-quality vlogs requires more than just recording video—it demands the right camera, superior audio quality, proper lighting, and an understanding of camera settings.
Essential Features for a Vlogging Camera
Flip Screen: A flip or articulating screen is highly desirable for a vlogging camera. It allows you to see yourself on the screen while standing in front of the camera, making it easy to frame your shot—especially when you are vlogging alone.
Autofocus: The camera should feature phase-detection autofocus, along with face and eye tracking. This ensures the camera stays focused on your face and eyes. Even if you are moving while talking or changing your position during a recording, the camera will maintain focus on your face.
Image Stabilization: In-body image stabilization is an incredibly useful feature. It helps minimize vibrations caused by camera movement during recording—a major advantage when filming while walking or recording without a tripod.
4K Video Recording: For video recording, the camera should support at least 4K resolution at 30 frames per second. 4K footage offers greater flexibility during editing, allowing you to crop or reframe your shots.
Recording Time: Some cameras have a 30-minute limit per recording session, whereas newer models often remove this restriction. For those conducting long interviews or recording continuous, extended footage, a camera without a recording time limit is highly beneficial. Battery Backup: Battery backup is equally important. If a camera shuts down after only 45 minutes of continuous recording, you will need to carry spare batteries. Therefore, always check the actual recording duration when purchasing a camera.
Camera Size: A lightweight and compact camera is easy to carry anywhere. For travel vloggers, a camera that can be easily tucked into a bag is particularly useful.
How to Choose the Right Lens for Vlogging
When you hold the camera yourself to record, a wide-angle lens is highly beneficial. It ensures that your face—along with a portion of the background—fits into the frame, even when the camera is held at a close distance. A lens with a focal length equivalent to 16mm–18mm is generally a good choice. Conversely, if you record while seated with the camera mounted on a tripod—positioned about one to two meters away—a lens with a focal length equivalent to 24mm–35mm would be suitable.
This provides better framing for your face. For travel and lifestyle vlogging, a zoom lens with a focal length range equivalent to 16mm–55mm is an excellent option; it eliminates the need to frequently change lenses to capture different types of shots. Prime lenses have a fixed focal length and are typically capable of capturing more light.
On the other hand, zoom lenses allow for adjustable focal lengths, making it easier to record videos from various distances and angles. For beginner vloggers, the "kit lens" that comes with the camera is often sufficient. Additionally, if your camera uses an APS-C sensor, the focal length calculation will differ from that of a full-frame camera. Typically, the full-frame equivalent focal length is determined by multiplying the focal length by 1.5. For example, a 10mm APS-C lens provides a field of view roughly equivalent to that of a 15mm full-frame lens.
Pay Attention to Audio Quality
In vlogging, clear audio is just as important as high-quality video. The built-in microphone on a camera often fails to capture clear sound in every situation; it may pick up unwanted noises, such as the sound of the camera’s internal motor, handling noise, wind, or ambient background sounds. An external microphone is a much better solution.
For recording in a studio or a quiet environment, you can use a shotgun microphone, which is mounted on top of the camera. Alternatively, wireless microphones have become quite popular; these clip onto your clothing and connect to the camera wirelessly.
This is especially useful for solo vloggers, as it ensures your voice is captured clearly even when the camera is positioned at a distance. If you are on a tight budget, you can start by using the camera’s built-in microphone, but investing in an external microphone later on is recommended for better audio quality.
How to Use a Vlogging Camera
To use a vlogging camera effectively, it is essential to understand the right settings.
Video Resolution: For general vlogging, 4K resolution at 30 fps (frames per second) is a great choice. It ensures high video quality and provides the flexibility to crop your footage during the editing process.
Frame Rate: If you want a cinematic look, you can record at 24 fps. For slow-motion footage, 60 fps is ideal; when you play back 60 fps footage at half-speed on a 30 fps editing timeline, you get smooth slow-motion results.
Shutter Speed: Shutter speed controls the motion blur that occurs when there is movement in your video. The "180-degree rule" is commonly used here, which suggests setting your shutter speed to approximately double your frame rate. You can set the shutter speed to 1/60th of a second for 30 fps, 1/50th of a second for 24 fps, and 1/120th of a second for 60 fps.
ND Filter: In bright sunlight, maintaining the correct shutter speed can result in footage that appears too bright. In such situations, an ND (Neutral Density) filter can be used. It reduces the amount of light reaching the lens, helping to keep the shutter speed at the desired level.
ISO Setting: ISO controls the camera sensor's sensitivity to light. Try to keep the ISO close to the camera's native (base) ISO value. Setting the ISO too high introduces digital noise into the footage. In low-light conditions, it is often better to improve the lighting rather than simply increasing the ISO.
Standard Picture Profile: If you are not experienced with video editing or color grading, use a 'Standard' or 'Neutral' picture profile. Footage recorded this way looks good straight out of the camera and requires minimal editing.
Log Picture Profile: If you know how to color grade, you can choose a 'Log' or 'Flat' picture profile. While the footage may appear desaturated and low-contrast, this format offers greater control over colors and exposure during the editing process.
Face and Eye Tracking: Enable the 'Face Detection' or 'Eye Tracking' option in your camera's autofocus settings. This ensures the camera maintains focus on your face and eyes while recording.
Continuous Autofocus: If your camera offers a 'Continuous Autofocus' mode, use it. This allows the camera to constantly adjust focus during recording—a particularly useful feature when you are moving or speaking in front of the camera. If you are starting to vlog for the first time, there is no need to buy expensive cameras or a lot of equipment. To begin with, a decent camera, a kit lens, an external microphone, and a tripod should be sufficient.
Disclaimer: This content has been sourced and edited from Dainik Jagran. While we have made modifications for clarity and presentation, the original content belongs to its respective authors and website. We do not claim ownership of the content.
